Start a website redesign content inventory with a reviewed list of existing URLs. For each page, keep a screenshot, its rendered HTML, and its on-page metadata. Then add your own decisions about what to keep, rewrite, or retire.
Tab Automation can visit that list in Chrome, save the HTML and screenshots, and collect metadata from the saved HTML. The result gives your team page references to work from while the original site is still available.
| Save | What it helps you review | What it leaves out |
|---|---|---|
| Screenshot | Layout, visible copy, navigation, and page appearance | Editable text, hidden states, and a working page |
| Rendered HTML | Main-document markup and text present at capture time | Bundled images, stylesheets, fonts, and a restorable site |
| SEO metadata export | Titles, descriptions, headings, canonical and robots declarations | Traffic, backlinks, SEO scores, or indexing verdicts |
These are references for the redesign. Keep your CMS/database backup and original media separately if you need to restore or rebuild the site.
Make a page list you can account for
Begin with two or three representative pages: a landing page, a content page, and a page with a different template. Once the capture looks useful, expand the list.
Use your existing URL inventory or a CMS export. A public XML sitemap is another starting point, but review it for missing private, unlinked, or older pages you still need. Google also recommends consulting sitemaps, analytics, server logs, and your CMS when identifying old URLs for a site move. Tab Automation does not pull those sources together for you.
Decide which page state matters before saving it. For example, a product page may show a different image after a color is selected. A screenshot and saved HTML record the state reached during that visit; they do not enumerate every variant, menu, or logged-in view.
For a staging site or account area, sign in first and follow capturing pages behind a login. Use pasted page URLs for that case. The sitemap collector accepts public sitemaps, not a sitemap requiring credentials.
Save HTML and a screenshot in the same pass
Use desktop Chrome with Tab Automation installed. Custom automations are free. Explorer access unlocks the full Dashboard, including Pages & SEO shown below; basic saved-result downloads and exports remain available without it.
- Open the first page, open the side panel, and choose New Automation. Give it a recognizable name, such as
Before the studio redesign. - Under Tab & Startup, turn off Always start this automation in a new tab and select the open tab.
- Add For Each Link → Paste list. Enter the two or three complete HTTP(S) URLs, one per line. Use a fresh loop without a picked link selector so it uses your pasted list.
- Inside Each Link, add Save Page and keep Rendered HTML selected. Under Advanced, use a readiness selector if you need a particular element to exist before saving. Set an extra delay when the page needs time to finish updating; the readiness timeout defaults to 30 seconds.
- Add Take a Screenshot after Save Page, still inside Each Link. Turn Full page on for a page-length image. Leave Adjust sticky elements (Experimental) off for this first reference set.
- Open Go To This Link → Open beside a sample URL. Use Test Save Page and Test screenshot, then inspect those separate Test results before running the list.
- Leave Repeat off in the End block and choose Save & Run. Keep Chrome open while the assigned tab visits each URL.
The loop starts empty: both output steps belong inside Each Link. If content arrives late, you can also put a fixed Wait / Delay before Save Page. Check the result rather than assuming a longer wait guarantees completeness.
The two steps run in sequence, so the HTML and PNG are not an atomic snapshot. On a changing page, check that they show a consistent state. Saving HTML before full-page capture also means content loaded only by the screenshot’s scrolling may be absent from the HTML. Reveal important content before both steps when you need it in both files.
To use a public sitemap instead of a pasted list, choose Sitemap, enter its URL, and select Collect links. Review and filter the addresses before running. The sitemap metadata guide covers collection limits and filters. Neither source discovers a complete site from its homepage.
Inspect a real three-page reference set
We ran an unpacked test build of Tab Automation 1.0.0 against three internal demo pages: Studio, Workshops, and Visit. The sequence was Save Page → Rendered HTML → Take a Screenshot, with Full page on and Repeat off. Save Page waited for #rendered-copy, with no extra delay and a 30-second readiness timeout.
The run retained three HTML files, three PNGs, and three metadata records. The Visit page deliberately had no meta description. Each page included text inserted by JavaScript; we checked that the exported HTML contained that rendered text and still referenced an external stylesheet.
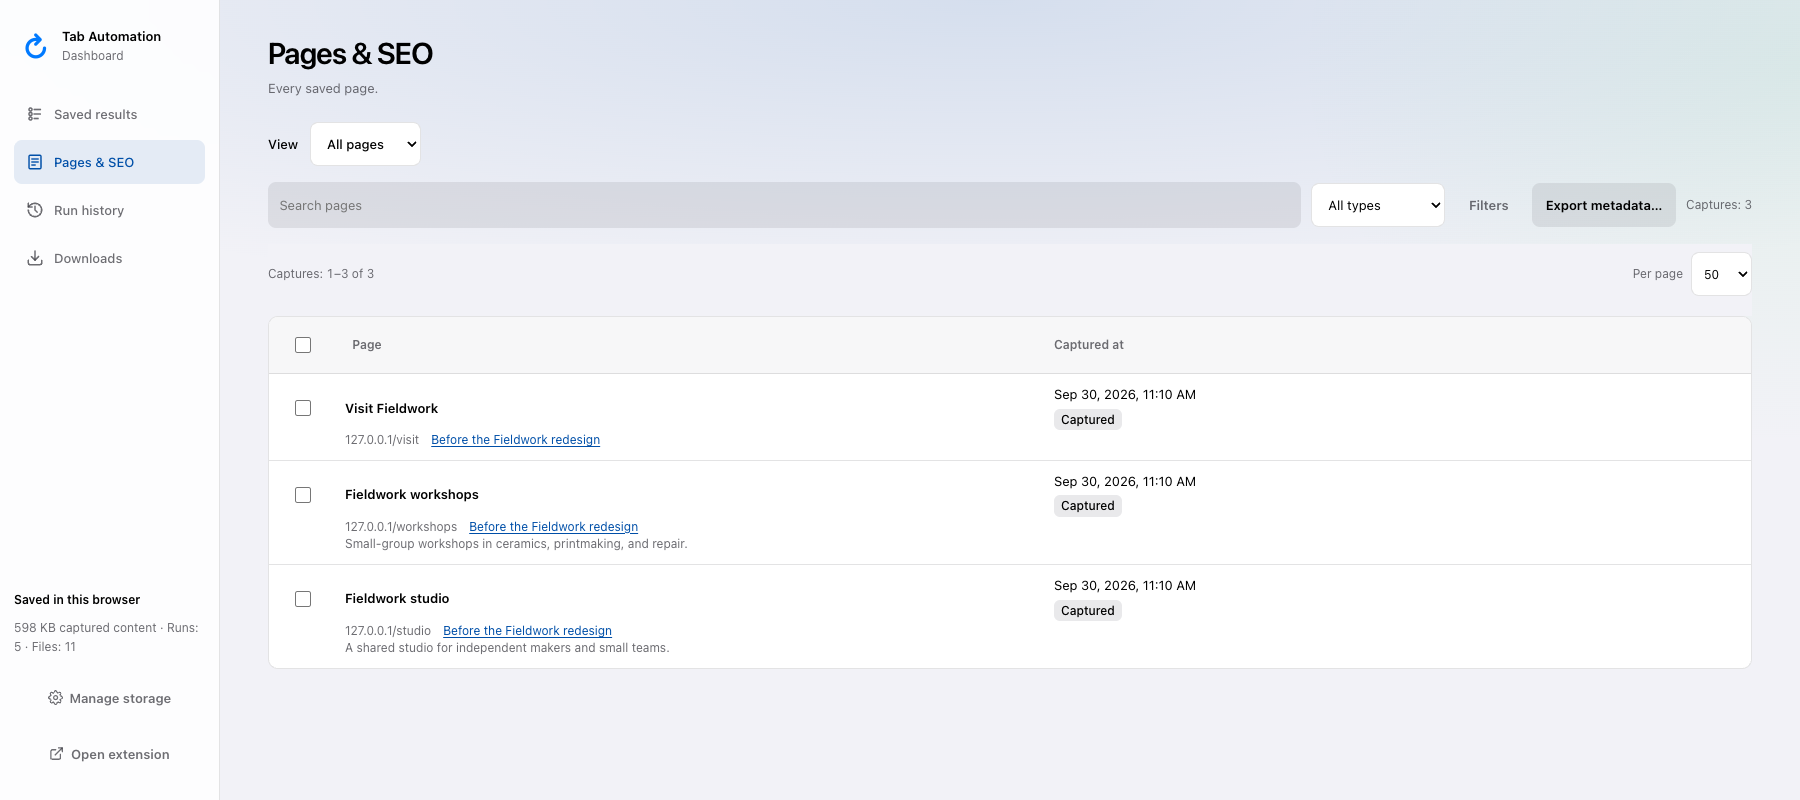
Real metadata collected from the saved demo HTML. Visit has no description; the inventory preserves that gap.
Download the actual reference ZIP or open the exported metadata CSV. We checked the ZIP for all six files and its accompanying SEO reports. The CSV has three page records. The local URLs belong to our capture fixtures; Fieldwork is demo content, not a customer migration.
See how it worksExport the reference files and metadata
After the run finishes, open Dashboard → Saved results and find its files. Download an individual HTML file or PNG, or select the run’s files and choose Export… → ZIP. Keep Test captures separate from the final set. Relevant ZIP exports include seo.json, seo.csv, and seo.md alongside the saved files.
For a standalone report, open Dashboard → Pages & SEO, use View → By run, and open the redesign run. Choose Export metadata…, select CSV, and export all matching captures or your selection. Check the scope so you do not mix earlier captures into this inventory. JSON and Markdown are also available.
Export is blocked while the run is running; finish or pause it first. Download a copy before treating the capture as a handoff. Results stay local in this browser, and uninstalling the extension or clearing its storage removes them.
Before sharing, check:
- Coverage: every expected URL has an HTML file and a PNG. Investigate missing pages and redirects, including redirects to sign-in.
- Appearance: open the screenshots and check the content below the fold. Inspect every
-partial.pngand its warning; a completed run is not proof of a complete visual record. - Metadata: review empty descriptions, unexpected titles, canonical URLs, and inspection statuses. Missing declarations are useful findings, not values to invent.
- Files: open the downloaded ZIP and confirm that it contains the reference files you intend to hand over.
For a deliberate second pass using the same automation, review Skip visited. Timed remembers visits for 24 hours; Never allows revisiting remembered URLs. Keep Repeat off when you want only one pass.
Turn the export into editorial decisions
Keep the exported CSV as your captured record. In a working spreadsheet copy, add columns for Decision, Owner, Proposed destination URL, and Notes. Fill those in with the people responsible for the redesign.
| Existing page | Decision | Owner | Proposed destination | Notes |
|---|---|---|---|---|
/studio |
Keep | Site editor | /studio |
Retain the introduction; review the new layout |
/workshops |
Rewrite | Program lead | /classes |
Confirm the new name and plan the URL change |
/visit |
Keep | Operations | /visit |
Add a description and verify opening times |
These are illustrative human decisions. Tab Automation does not score the content, assign owners, choose destinations, or configure redirects. If URLs change, use the mapping to plan the migration with your developer; Google’s site-move guidance covers redirects and monitoring. Saving a reference set does not guarantee that rankings will stay unchanged.
Know what you still need to preserve
Rendered HTML keeps linked assets external. It does not bundle images, fonts, scripts, or stylesheets into an offline website, and it does not reconstruct iframe documents, shadow DOM, canvas pixels, or live form properties. Use your CMS or hosting backup process for a restorable copy, and keep original media files separately.
Full-page screenshots have size and time limits, can miss virtualized rows or nested scroll areas, and do not click every Load more button. Metadata reports describe the captured HTML, with inspection limits shown in Results. Traffic history, backlinks, redirects, and server configuration need their own records.
The rendered-HTML guide explains capture readiness and recovery. Use it when a page is missing content, then recapture a small sample before extending the inventory.